What to do?
회원가입 화면(UI) 구현
데모영상
Custom Thema
- Color
- Appbar, Tabbar
- Light mode, Dark mode
const kPrimary = Color(0xFFEF1B48);
const kBubbleLight = Color(0xFFE8E8E8);
const kBubbleDark = Color(0xFF262629);
const kAppBarDark = Color(0xFF111111);
const kActiveUsersDark = Color(0xFF3B3B3B);
const kIndicatorBubble = Color(0xFF39B54A);
const kIconLight = Color(0xFF999999);;

final appBarTheme = AppBarTheme(
  centerTitle: false,
  elevation: 0,
  backgroundColor: Colors.white,
);

final tabBarTheme = TabBarTheme(
  indicatorSize: TabBarIndicatorSize.label,
  unselectedLabelColor: Colors.black54,
  indicator: BoxDecoration(
    borderRadius: BorderRadius.circular(50),
    color: kPrimary,
  ),
);

final dividerTheme = DividerThemeData().copyWith(thickness: 1.0, indent: 75.0);

ThemeData lightTheme(BuildContext context) => ThemeData.light().copyWith(
      primaryColor: kPrimary,
      scaffoldBackgroundColor: Colors.white,
      appBarTheme: appBarTheme,
      tabBarTheme: tabBarTheme,
      dividerTheme: dividerTheme.copyWith(color: kIconLight),
      iconTheme: IconThemeData(color: kIconLight),
      textTheme: GoogleFonts.comfortaaTextTheme(Theme.of(context).textTheme)
          .apply(displayColor: Colors.black),
      visualDensity: VisualDensity.adaptivePlatformDensity,
    );

ThemeData darkTheme(BuildContext context) => ThemeData.dark().copyWith(
    primaryColor: kPrimary,
    scaffoldBackgroundColor: Colors.black,
    tabBarTheme: tabBarTheme.copyWith(unselectedLabelColor: Colors.white70),
    appBarTheme: appBarTheme.copyWith(backgroundColor: kAppBarDark),
    dividerTheme: dividerTheme.copyWith(color: kBubbleDark),
    iconTheme: IconThemeData(color: Colors.black),
    textTheme: GoogleFonts.comfortaaTextTheme(Theme.of(context).textTheme)
        .apply(displayColor: Colors.white),
    visualDensity: VisualDensity.adaptivePlatformDensity);

bool isLightTheme(BuildContext context) {
  return MediaQuery.of(context).platformBrightness == Brightness.light;
}
구현 화면
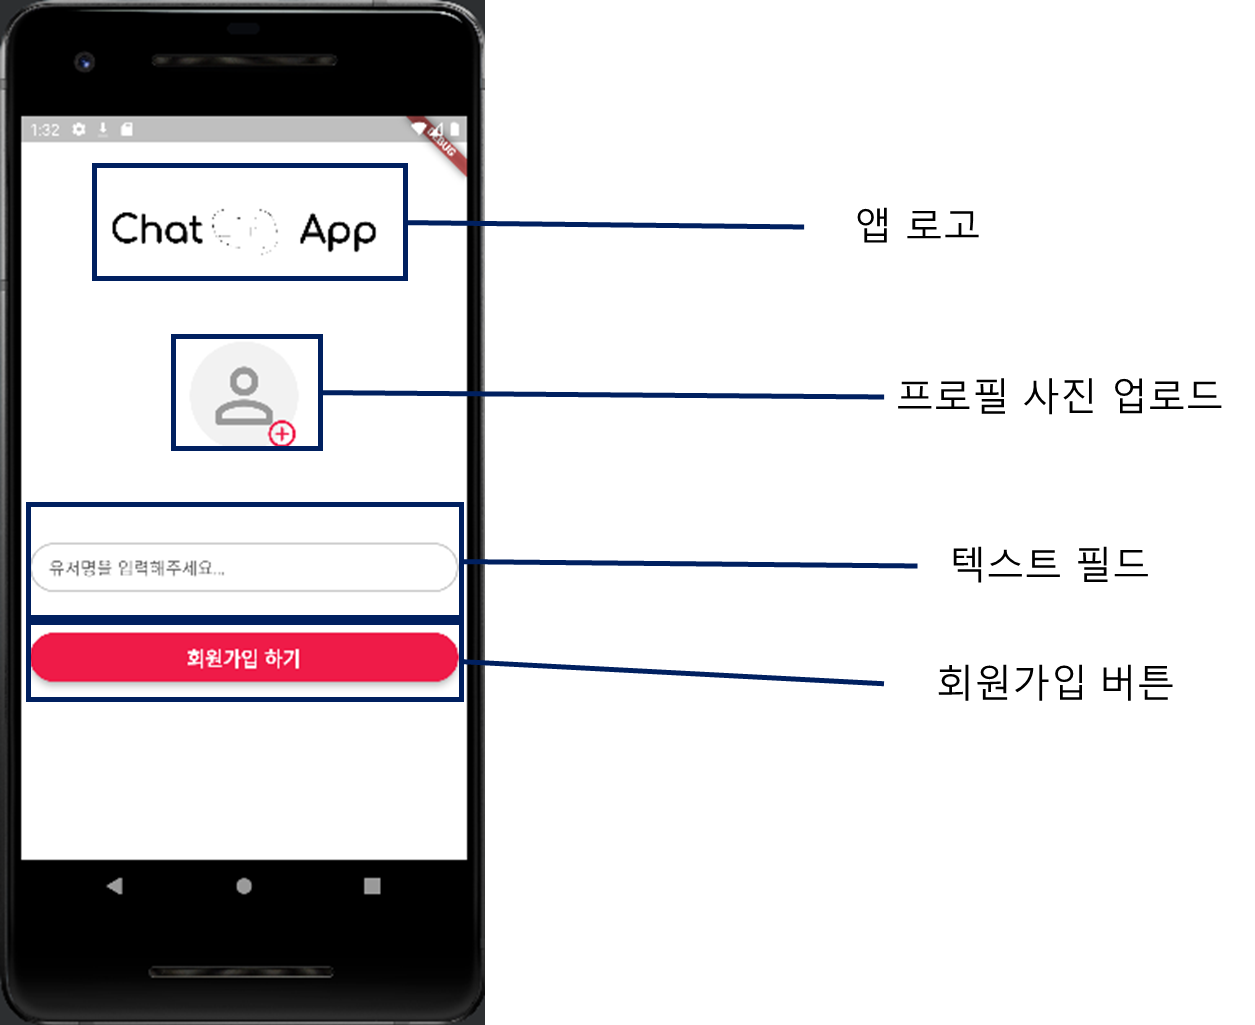
회원가입 화면은 크게 4가지로 구성
- 앱 로고
- 프로필 사진
- 텍스트 필드
- 회원가입 버튼
Widgets
- Elevated Button
- 회원가입 버튼
class ElevatedBtn extends StatelessWidget {
  final Function onPressed;
  final String btnText;
  final double height;

  const ElevatedBtn({Key key, this.onPressed, this.btnText, this.height = 45})
      : super(key: key);

  @override
  Widget build(BuildContext context) {
    return ElevatedButton(
      onPressed: onPressed,
      style: ElevatedButton.styleFrom(
          primary: kPrimary,
          elevation: 5.0,
          shape: RoundedRectangleBorder(
              borderRadius: BorderRadius.circular(45.0))),
      child: Container(
        height: 45.0,
        alignment: Alignment.center,
        child: Text(
          btnText,
          style: Theme.of(context).textTheme.button.copyWith(
              fontSize: 18.0, color: Colors.white, fontWeight: FontWeight.bold),
        ),
      ),
    );
  }
}
- App Logo
- 앱 로고
Widget _logoImage(BuildContext context) {
  // TODO : 로고 이미지 수정
  const lightThemeLogoImageSrc = 'assets/images/logo.png';
  const darkThemeLogoImageSrc = 'assets/images/logo.png';
  return (isLightTheme(context)
      ? Image.asset(
          lightThemeLogoImageSrc,
          fit: BoxFit.fill,
        )
      : Image.asset(
          darkThemeLogoImageSrc,
          fit: BoxFit.fill,
        ));
}

TextStyle _logoTextStyle(BuildContext context) {
  return Theme.of(context)
      .textTheme
      .headlineMedium
      .copyWith(fontWeight: FontWeight.bold);
}

Widget logoWidget(BuildContext context) {
  TextStyle logoTextStyle = _logoTextStyle(context);

  return SizedBox(
    height: 50,
    child: Row(
      mainAxisAlignment: MainAxisAlignment.center,
      crossAxisAlignment: CrossAxisAlignment.center,
      children: <Widget>[
        Text("Chat", style: logoTextStyle),

        /// logo image
        _logoImage(context),

        /// logo text
        Text("App", style: logoTextStyle),
      ],
    ),
  );
}
- Custom TextFiled
- 유저명 입력창
class CustomTextField extends StatelessWidget {
  final String hint;
  final Function(String text) onChanged;
  final double height;
  final TextInputAction textInputAction;

  const CustomTextField(
      {Key key,
      this.hint,
      this.onChanged,
      this.height = 54.0,
      this.textInputAction})
      : super(key: key);

  @override
  Widget build(BuildContext context) {
    return Container(
      height: height,
      decoration: BoxDecoration(
          color: isLightTheme(context) ? Colors.white : kBubbleDark,
          borderRadius: BorderRadius.circular(35.0),
          border: Border.all(
              color: isLightTheme(context)
                  ? const Color(0xFFC4C4C4)
                  : const Color(
                      0xFF393737,
                    ),
              width: 1.5)),
      child: TextField(
          keyboardType: TextInputType.text,
          onChanged: onChanged,
          textInputAction: textInputAction,
          cursorColor: kPrimary,
          decoration: InputDecoration(
              contentPadding:
                  const EdgeInsets.only(left: 16.0, right: 16.0, bottom: 8.0),
              hintText: hint,
              border: InputBorder.none)),
    );
  }
}
- ProfileUpload
- 프로필 사진 업로드
class ProfileUploadWidget extends StatelessWidget {
  final double _size = 100.0;

  const ProfileUploadWidget({Key key}) : super(key: key);

  @override
  Widget build(BuildContext context) {
    return SizedBox(
      height: _size,
      width: _size,
      child: Material(
        color: _color(context),
        borderRadius: BorderRadius.circular(128.0),
        child: InkWell(
          onTap: () async {
            await context.read<ProfileImageCubit>().getImage();
          },
          child: Stack(
            fit: StackFit.expand,
            children: [
              _circularAvatar(context, _size),
              _addIcon(_size),
            ],
          ),
        ),
      ),
    );
  }
}

Color _color(context) =>
    isLightTheme(context) ? const Color(0xFFF2F2F2) : Colors.black;

Color _iconColor(context) => isLightTheme(context) ? kIconLight : Colors.black;

Icon _personIcon(context, size) => Icon(
      Icons.person_outline_rounded,
      size: size * 0.8,
      color: _iconColor(context),
    );

Align _addIcon(size) => Align(
      alignment: Alignment.bottomRight,
      child: Icon(
        Icons.add_circle_outline_rounded,
        size: size * 0.3,
        color: kPrimary,
      ),
    );

ClipRRect _profileImage(context, size, state) => ClipRRect(
      borderRadius: BorderRadius.circular(size),
      child: Image.file(
        state,
        width: size,
        height: size,
        fit: BoxFit.fill,
      ),
    );

Widget _circularAvatar(BuildContext context, double size) {
  return CircleAvatar(
      backgroundColor: Colors.transparent,
      child: BlocBuilder<ProfileImageCubit, File>(builder: (context, state) {
        return state == null
            ? _personIcon(context, size)
            : _profileImage(context, size, state);
      }));
}
On Board Page
위에서 만든 위젯들을 사용해 회원가입 페이지 구성
class OnBoarding extends StatefulWidget {
  const OnBoarding({Key key}) : super(key: key);

  @override
  State<OnBoarding> createState() => _OnBoardingState();
}

class _OnBoardingState extends State<OnBoarding> {
  String _username;

  @override
  Widget build(BuildContext context) {
    return Scaffold(
        appBar: AppBar(
          backgroundColor: Colors.transparent,
        ),
        resizeToAvoidBottomInset: false,
        body: SafeArea(
          child: Column(
            crossAxisAlignment: CrossAxisAlignment.center,
            children: <Widget>[
              /// 로고
              logoWidget(context),
              const Spacer(),

              /// 프로필 사진
              const ProfileUploadWidget(),
              const Spacer(
                flex: 1,
              ),

              /// 닉네임 입력창
              Padding(
                padding: const EdgeInsets.all(8.0),
                child: CustomTextField(
                    hint: '유저명을 입력해주세요...',
                    height: 45.0,
                    onChanged: _handleUsername,
                    textInputAction: TextInputAction.done),
              ),
              const SizedBox(
                height: 20.0,
              ),

              /// 회원가입 버튼
              Padding(
                padding: const EdgeInsets.all(8.0),
                child: ElevatedBtn(
                    onPressed: _handleSubmit, btnText: "회원가입 하기", height: 45.0),
              ),
              const Spacer(),

              /// 로딩중
              BlocBuilder<OnBoardingCubit, OnBoardingState>(
                builder: (context, state) => state is OnBoardingLoading
                    ? const Center(
                        child: CircularProgressIndicator(),
                      )
                    : Container(),
              ),
              const Spacer()
            ],
          ),
        ));
  }

  String _checkUsername() {
    var err = "";
    if (_username.isEmpty) err = "유저명을 입력하지 않았습니다.";
    if (context.read<ProfileImageCubit>().state == null) {
      err = '$err\n프로필 사진을 업로드하지 않았습니다.';
    }
    return err;
  }

  _connectSession() async {
    final profileImage = context.read<ProfileImageCubit>().state;
    await context.read<OnBoardingCubit>().connect(_username, profileImage);
  }

  /// 제출 버튼 클릭
  /// 1) 유저명 검사 및 에러 메세징 처리
  /// 2) 이미지 업로드 서버(Node JS)와 연결
  _handleSubmit() async {
    final err = _checkUsername();
    if (err.isNotEmpty) {
      final sb = SnackBar(
          content: Text(
        err,
        style: const TextStyle(fontSize: 14, fontWeight: FontWeight.bold),
      ));
      ScaffoldMessenger.of(context).showSnackBar(sb);
      return;
    }
    await _connectSession();
  }

  _handleUsername(text) {
    _username = text;
  }
}
Remark
앱을 실행해보기 위해서 다음의 두가지를 준비를 해야 함
△ 데이터베이스(RethinkDB)
△ 이미지 업로드 서버(Node JS)
# docker container 실행
docker run -d -p 8080:8080 -p 28015:28015 rethinkdb

# 이미지 업로드 서버 실행
node server/app.js
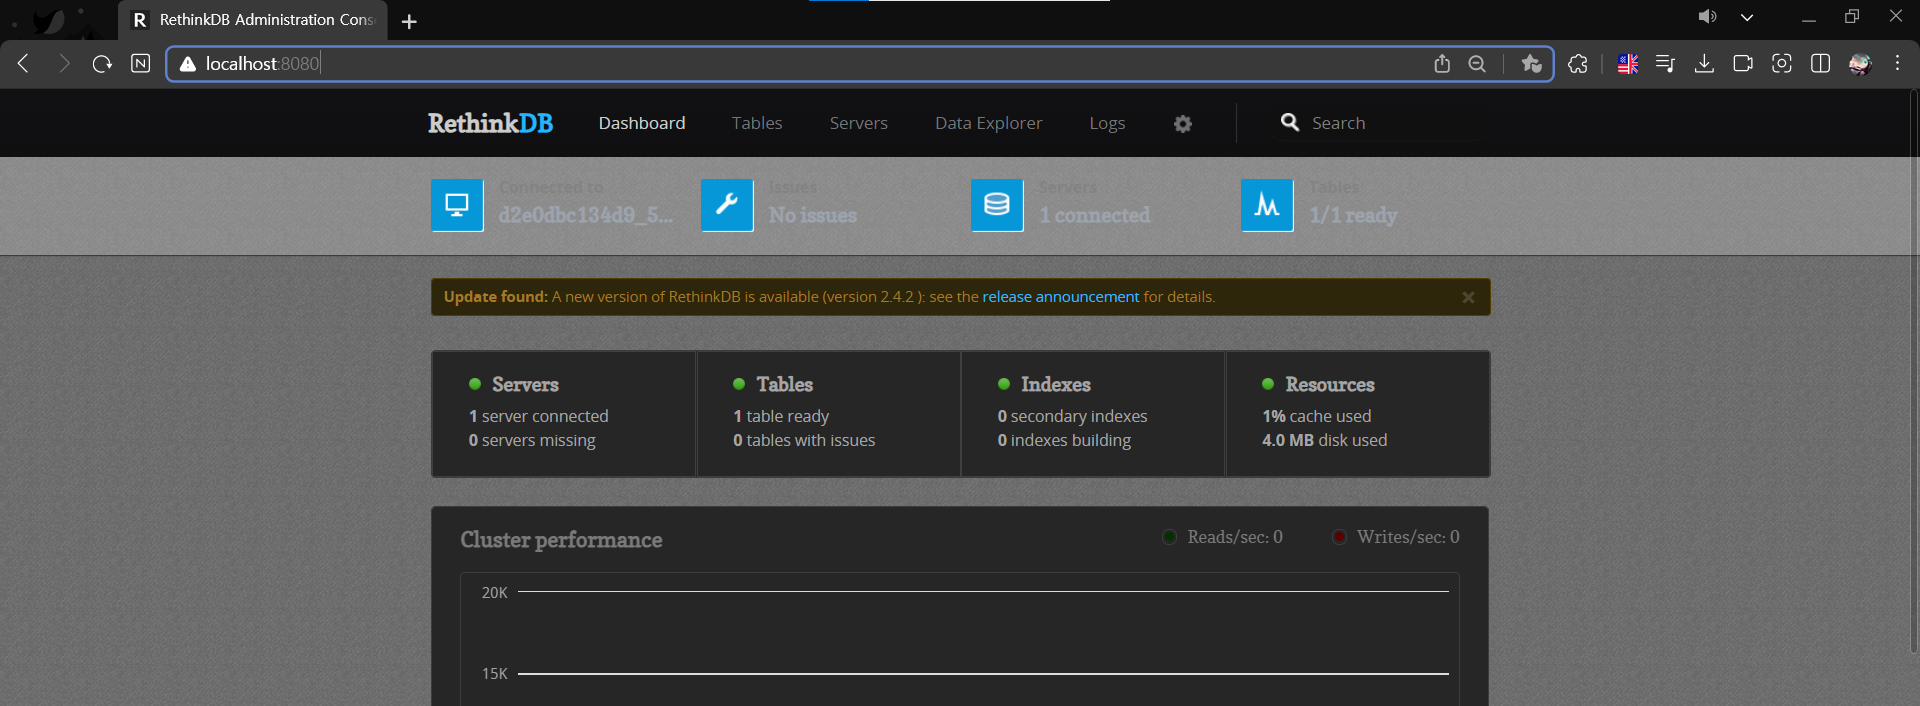
Docker container를 실행시키고, localhost:8080으로 접속하면 다음과 같은 대쉬보드가 나온다.
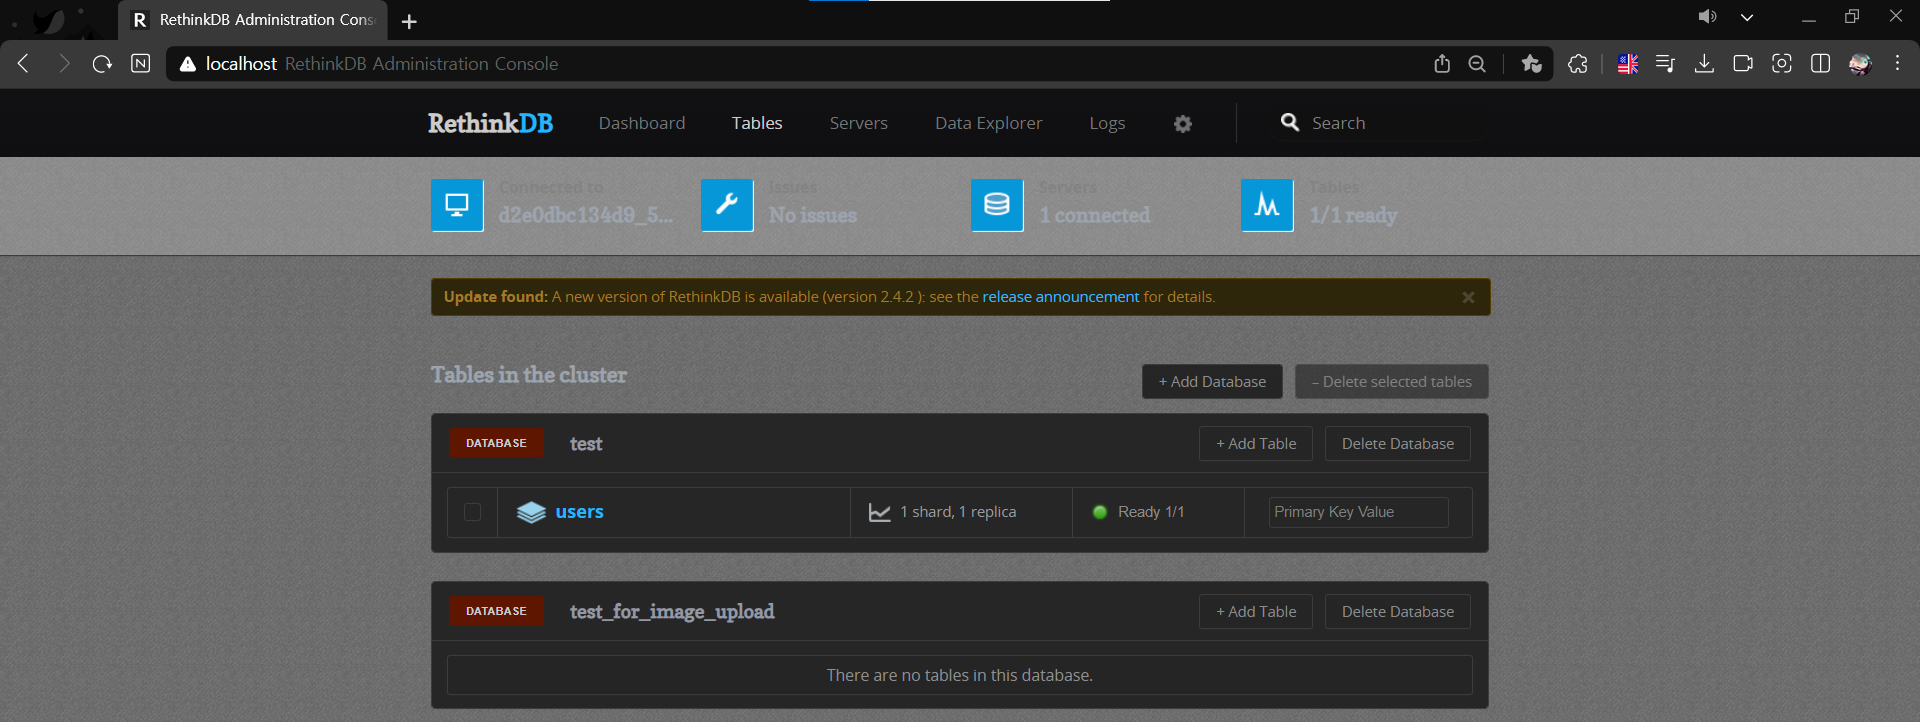
미리 만들어둔 데이터베이스(test_for_image_upload)와 테이블(users)가 생성된걸 확인
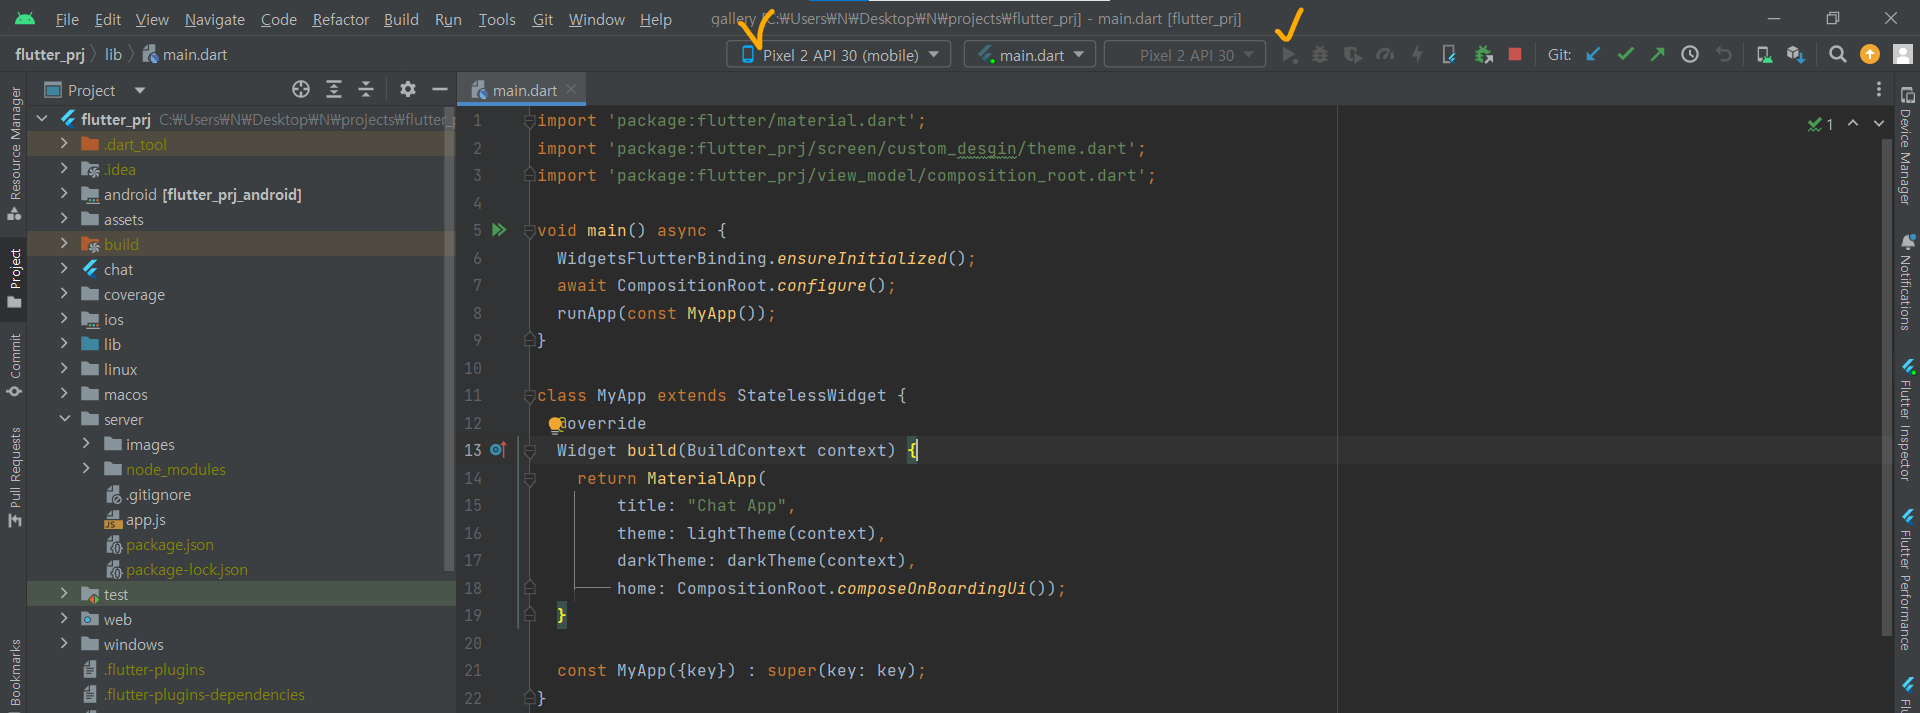
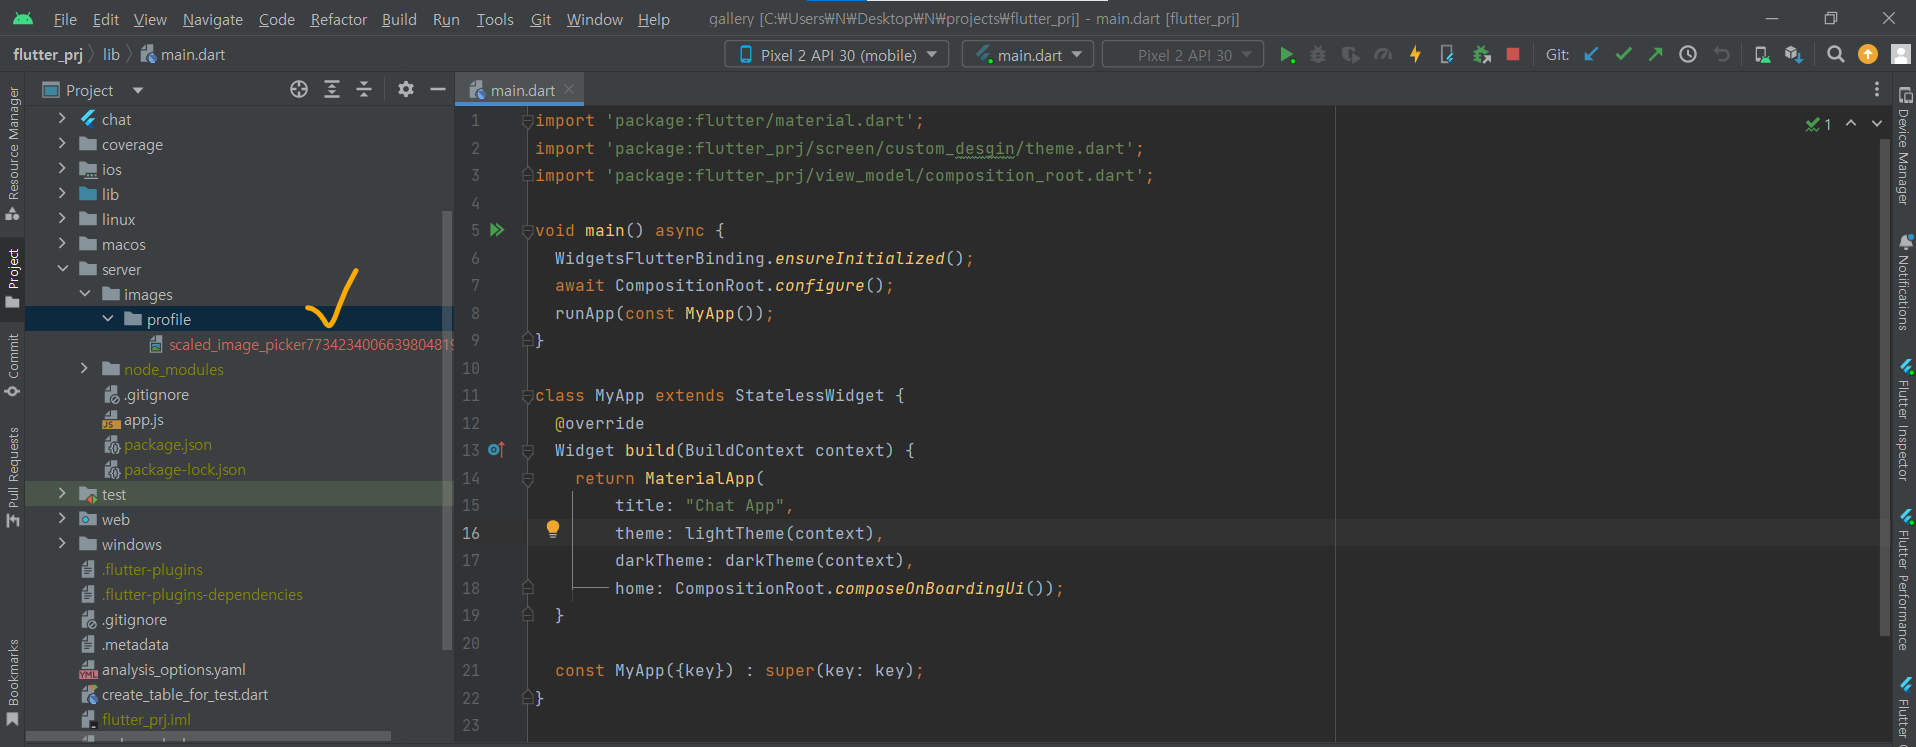
Emulator를 선택하고, main.dart 파일 실행
회원가입을 수행하면, /server/images/profile 경로에 이미지가 저장되는걸 확인할 수 있다.
'Flutter' 카테고리의 다른 글
| [Flutter] 채팅앱 만들기 #10 (0) | 2023.03.11 |
|---|---|
| [Flutter] 채팅앱 만들기 #8 (0) | 2023.03.07 |
| [Flutter] 채팅앱 만들기 #7 (0) | 2023.03.05 |
| [Flutter] 채팅앱 만들기 #6 (0) | 2023.03.05 |
| [Flutter] 채팅앱 만들기 #5 (0) | 2023.03.04 |


